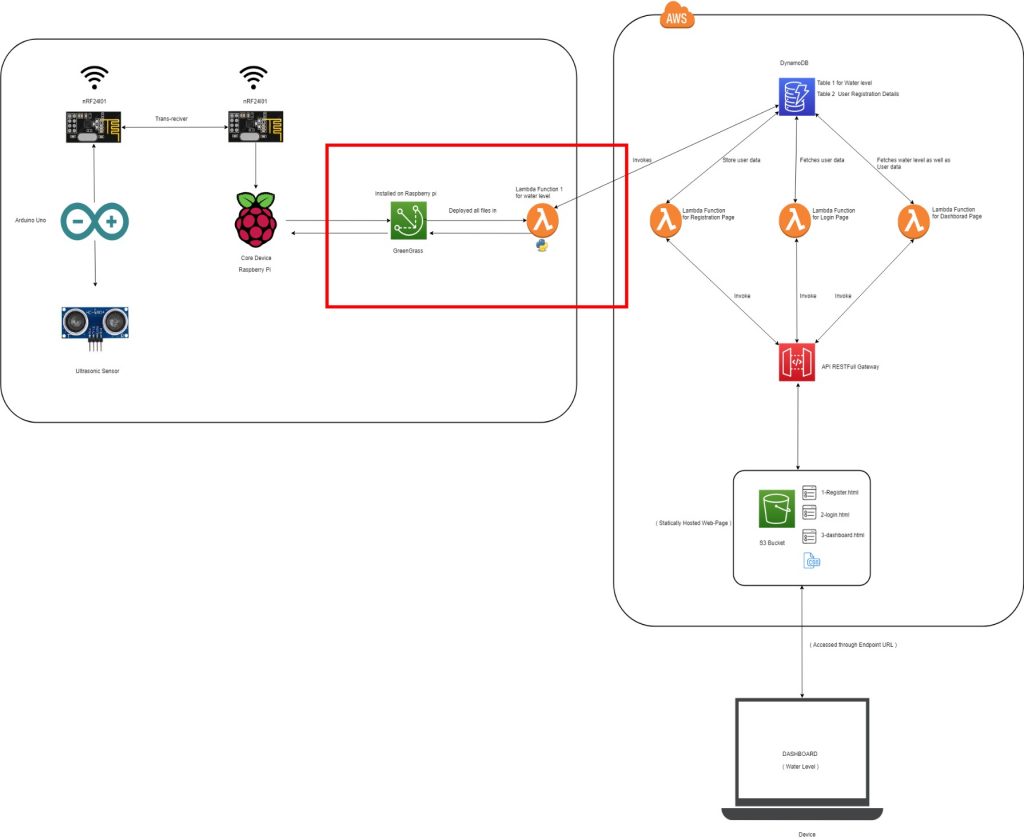
AWS Greengrass with DynamoDB (Part - I)
1. Introduction:
2. Setup Raspberry pi:
You can refer our earlier blog WIRELESS COMMUNICATION BETWEEN ARDUINO AND RASPBERRY PI USING NRF24L01 Part 2 for setting up of the Raspberry Pi or visit the AWS documentation for Setting up of the Raspberry Pi https://docs.aws.amazon.com/greengrass/latest/developerguide/setup-filter.rpi.html
sudo adduser --system ggc_user
sudo addgroup --system ggc_group
cd /etc/sysctl.d
ls
Note: If you don’t see the 98-rpi.conf file, follow the instructions in the README.sysctl file.
fs.protected_hardlinks = 1
fs.protected_symlinks = 1
sudo sysctl -a 2> /dev/null | grep fs.protected
cd /boot/
cgroup_enable=memory cgroup_memory=1
cd /home/pi/Downloads
mkdir greengrass-dependency-checker-GGCv1.9.x
cd greengrass-dependency-checker-GGCv1.9.x
wget https://github.com/aws-samples/aws-greengrass-samples/raw/master/greengrass-
dependency-checker-GGCv1.9.x.zip
unzip greengrass-dependency-checker-GGCv1.9.x.zip
sudo modprobe configs
sudo ./check_ggc_dependencies | more
3. Installing the AWS IoT Greengrass Core Software:
- This shows you how to install the AWS IoT Greengrass Core software on your device. This tutorial provides instructions for setting up a Raspberry Pi, but you can use any supported device.
- Below is Step by Step link provided by AWS Greengrass documentation to install its software on core device
https://docs.aws.amazon.com/greengrass/latest/developerguide/module2.html - You will be following whole module till the Greengrass is successfully running on the core device.

- The end result should look like this.
4. Lambda Functions on AWS IoT Greengrass with DynamoDB:
Step1: Configure IAM Roles:
1. In the IAM console, in the navigation pane, choose Roles, and then choose Create Role.
2. Under Select type of trusted entity, choose AWS service.
3. Under Choose the service that will use this role, choose Greengrass, and then choose Next: Permissions.
4. On the Attach permissions policies page, select the following policies, and then choose Next: Tags.
- AWSGreengrassResourceAccessRolePolicy
- AWSGreengrassFullAccess
- AmazonDynamoDBFullAccess
5. Choose Next: Review. You don’t need to create tags for this tutorial.
- For Role name, enter Greengrass_DynamoDB_Role.
- For Role description, enter Greengrass group role.
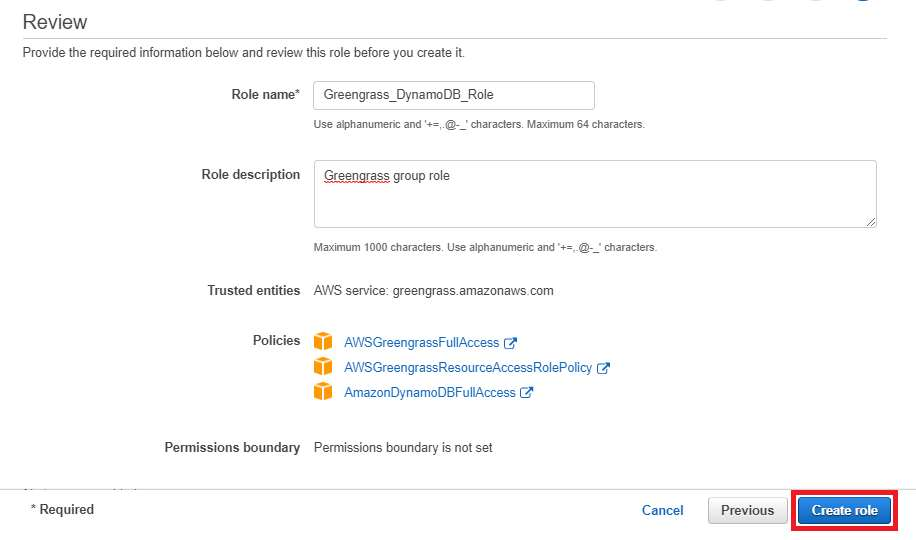
7. Repeat the previous step to create the role for the AWS Lambda service. Select the same policies (AWSGreengrassResourceAccessRolePolicy,AWSGreengrassFullAccess, andAmazonDynamoDBFullAccess). For Role name, enter Lambda_DynamoDB_Role.
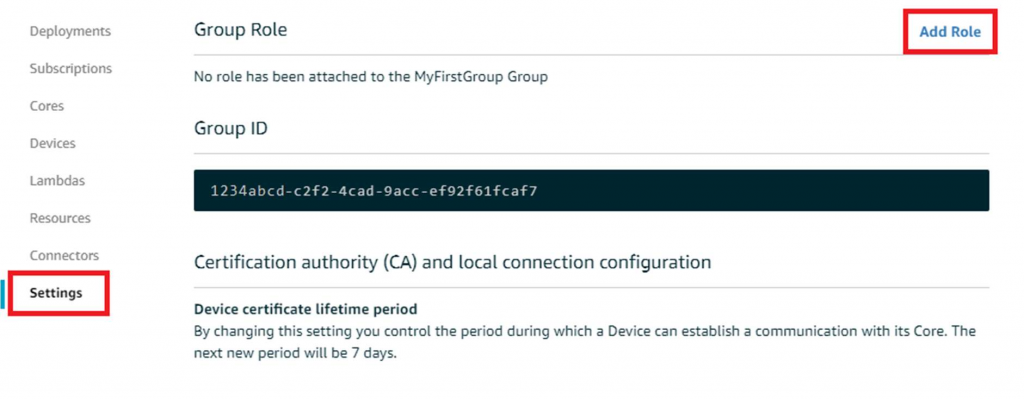
8. In the AWS IoT Core console, under Greengrass, choose Groups, and then choose your AWS IoT Greengrass group.
9. Choose Settings, and then choose Add Role.
Step2: Create and Configure the Lambda Function:
2. On your computer, create a folder named AWS-Greengrass-With-DynamoDB
3. From the AWS-Greengrass-With-DynamoDB repository on GitHub, download the greengrassHelloWorld.py function to the AWS-Greengrass-With-DynamoDB folder.
- The greengrasssdk folder. This is the SDK.
pip install boto3 -t path-to- AWS-Greengrass-With-DynamoDB -folder
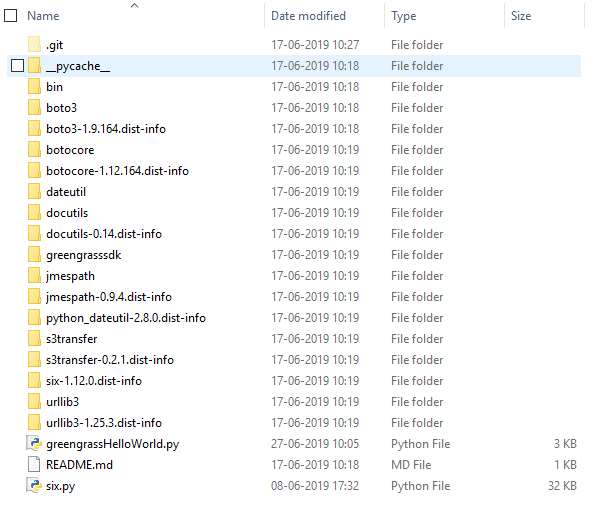
9. Compress the contents of the AWS-Greengrass-With-DynamoDB folder into a .zip file named hello_world_python_lambda.zip. (Compress the folder’s contents, not the folder.) This is your Lambda function deployment package.
12. Name your function Greengrass_HelloWorld, and set the remaining fields as follows:
- Open the Lambda console and choose Create function.
- Choose Author from scratch.

13. Choose Create function.
14. Upload your Lambda function deployment package:
i. For Code entry type, choose Upload a .zip file.
ii. For Runtime, choose Python 2.7.
iii. For Handler, enter greengrassHelloWorld.function_handler
b) Choose Upload, and then choose hello_world_python_lambda.zip. (The size of your hello_world_python_lambda.zip file might be different from what’s shown here.)
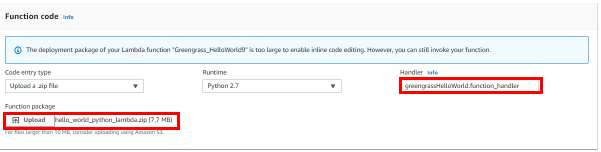
c) Choose Save.

Note: The Test button on the AWS Lambda console doesn’t work with this function. The AWS IoT Greengrass Core SDK doesn’t contain modules that are required to run your Greengrass Lambda functions independently in the AWS Lambda console.
Tip
To see your uploaded code, from Code entry type, choose Edit code inline.
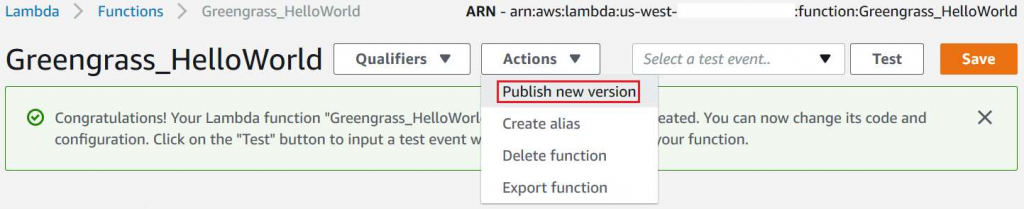
15. Publish the Lambda function:
a) From Actions, choose Publish new version
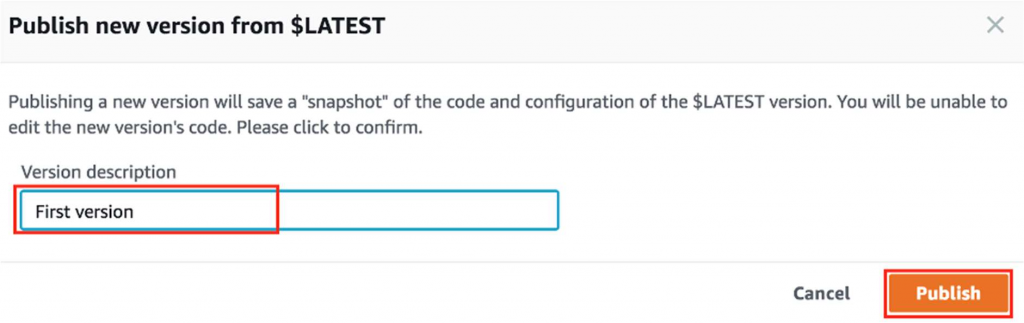
b) For Version description, enter First version, and then choose Publish.
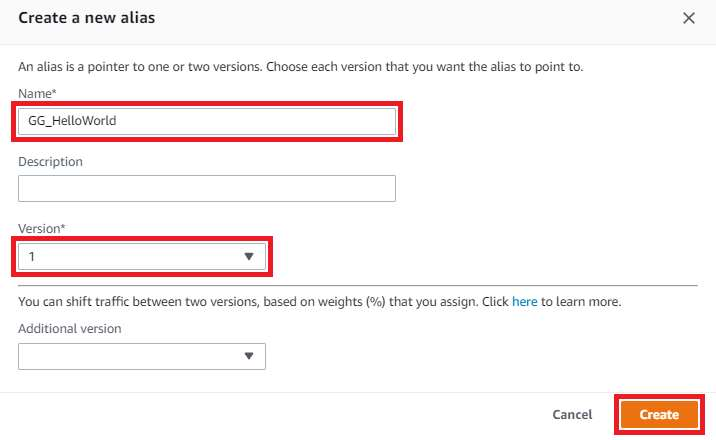
16. Create an alias for the Lambda function version
Note
a) From Actions, choose Create alias.
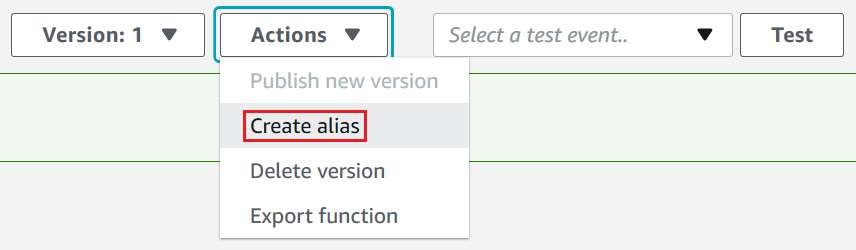
b) Name the alias GG_HelloWorld, set the version to 1 (which corresponds to the version that you just published), and then choose Create.
Note
AWS IoT Greengrass doesn’t support Lambda aliases for $LATEST versions.
17. In the AWS IoT Core console, add the Lambda function that you just created to your AWS IoT Greengrass group:
a) On the group configuration page, choose Lambdas, and then choose Add Lambda.
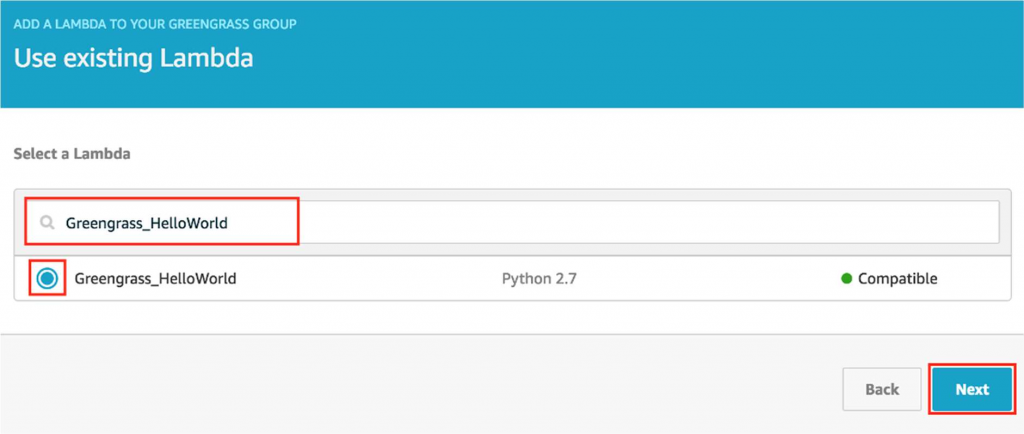
b) Choose Use existing Lambda.

18. Choose Greengrass_HelloWorld, and then choose Next
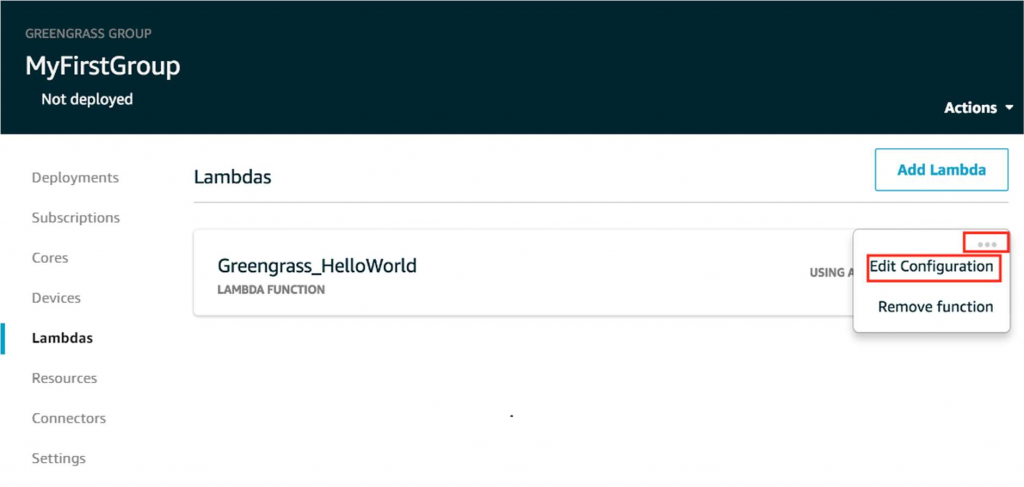
19. For the version, choose Alias: GG_HelloWorld, and then choose Finish. You should see the Greengrass_HelloWorld Lambda function in your group, using the GG_HelloWorld alias.
20. Choose the ellipsis (…), and then choose Edit Configuration:
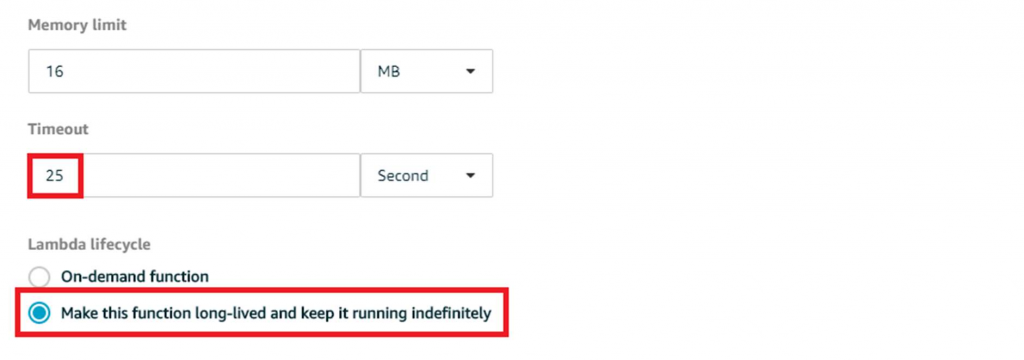
21. On the Group-specific Lambda configuration page, make the following changes:
- Set Timeout to 25 seconds. This Lambda function sleeps for 20 seconds before each invocation
- For Lambda lifecycle, choose Make this function long-lived and keep it running indefinitely.
- Set Timeout to 25 seconds. This Lambda function sleeps for 20 seconds before each invocation
- For Lambda lifecycle, choose Make this function long-lived and keep it running indefinitely.
Note
A long-lived Lambda function starts automatically after AWS IoT Greengrass starts and keeps running in its own container (or sandbox). This is in contrast to an on-demand Lambda function, which starts when invoked and stops when there are no tasks left to execute. For more information, see Lifecycle Configuration for Greengrass Lambda Functions.
22. Keep the default values for all other fields, such as Run as, Containerization, and Input payload data type, and choose Update to save your changes
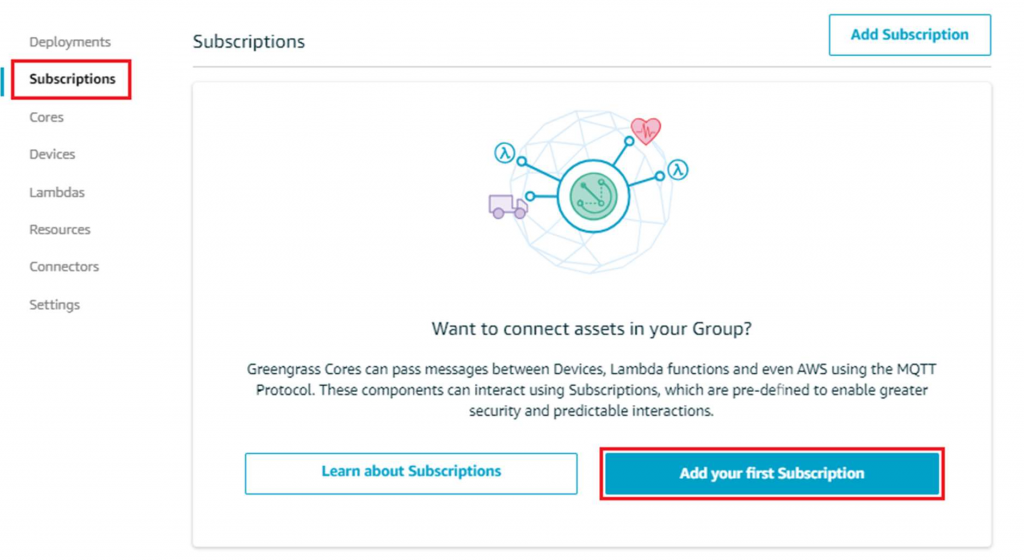
23. Next, create a subscription that allows the Lambda to send MQTT messages to AWS IoT.
24. On the group configuration page, choose Subscriptions, and then choose Add your first Subscription.
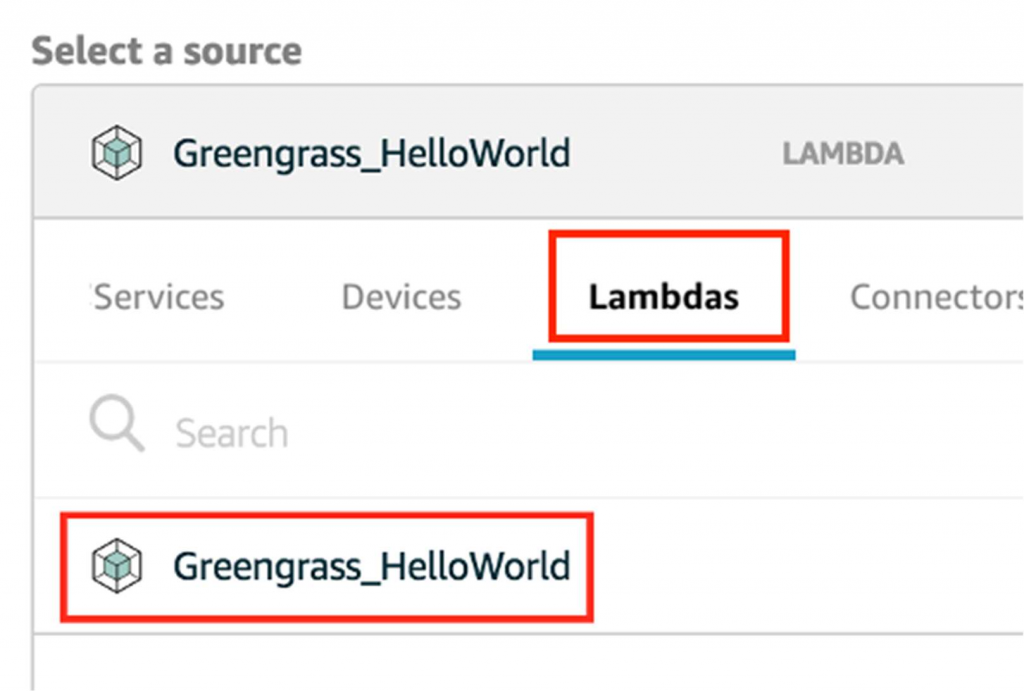
25. In Select a source, choose Select. Then, on the Lambdas tab, choose Greengrass_HelloWorld as the source.
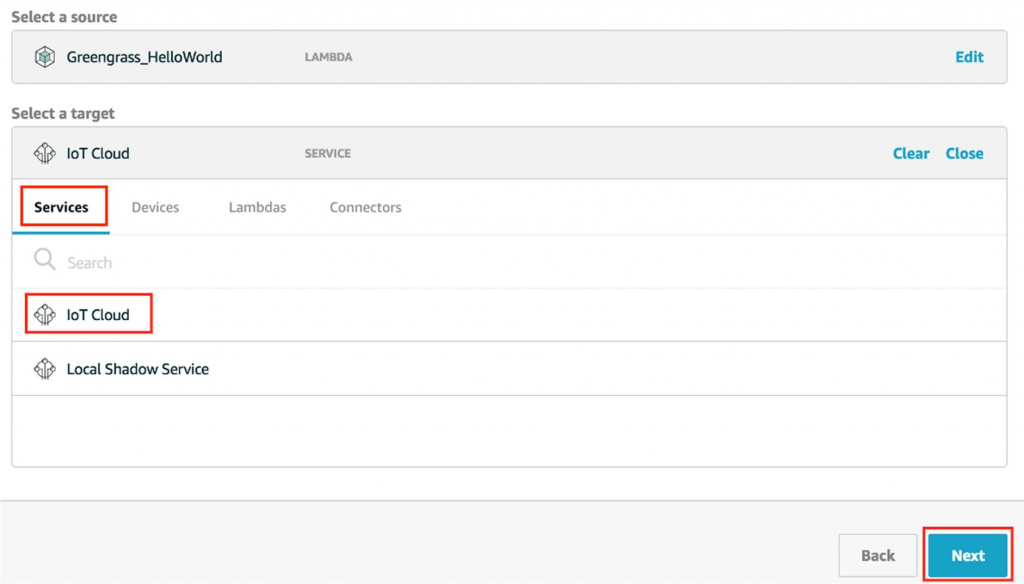
26. For Select a target, choose Select. Then, on the Service tab, choose IoT Cloud, and then choose Next.
27. For Topic filter, enter hello/world4, and then choose Next.
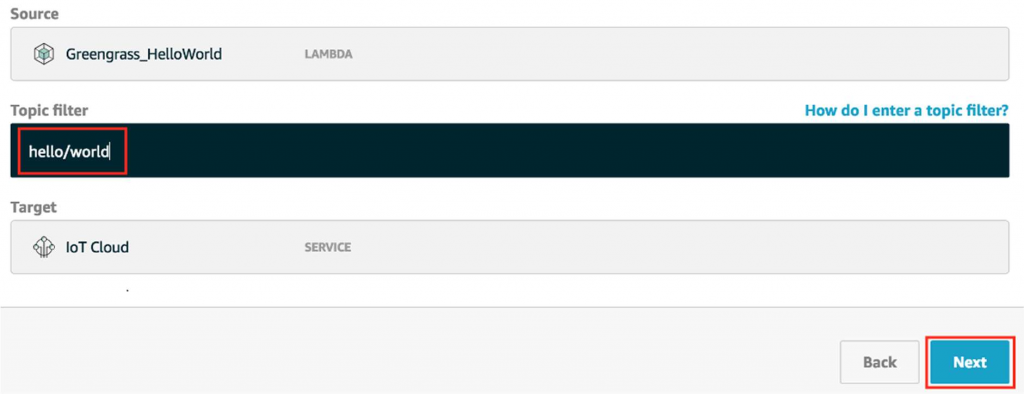
28. Choose Finish
5. Deploy Cloud Configurations to an AWS IoT Greengrass Core Device
To deploy this lambda function on core device refer this link https://docs.aws.amazon.com/greengrass/latest/developerguide/configs-core.html
6. Verify the Lambda Function Is Running on the Device
To verify whether everything is running you can refer this link
https://docs.aws.amazon.com/greengrass/latest/developerguide/lambda-check.html