SwiftUI introduces a brand new approach to build User Interfaces for iOS apps. In this post, you learn how to step up a new project and basics of working with SwiftUI.
1. macOS 10.15 Beta. 2. SwiftUI can be implemented in macOS 10.14.5 Mojave but the issue is that Preview can not be displayed. 3. UIKit for Mac 13.0+. 4. macOS Catalina 10.15 Beta 3. 5. Xcode 11 beta 2, Xcode 11 beta 3.
Download XCode or macOS Update Version Link:
https://developer.apple.com/news/releases/
Introduction to SwiftUI:
SwiftUI is a modern way to declare User Interfaces for any Apple Platform. Create Beautiful,
dynamic apps faster than ever before.
It helps the developers to easily design with less coding.
SwiftUI language is easy to read, write and understand code.
Describe your layout just once.
Declare the content and layout for any state of your view.
Working with SwiftUI:
SwiftUI
SwiftUI declares the user interface and behaviour for your app on every platform.
According to Apple SwiftUI is an innovative new way to build user interfaces across all Apple platforms, so you can create better apps with less code.
SwiftUI syntax is easy to read and write.
Syntax
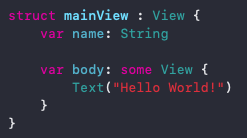
SwiftUI uses a declarative syntax so you can simply state what your user interface should do .
E.g:- like we can Display Text. so your code is..
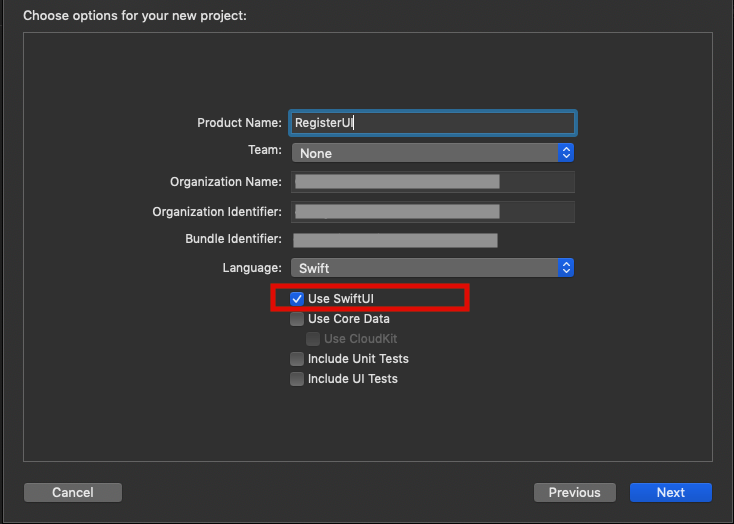
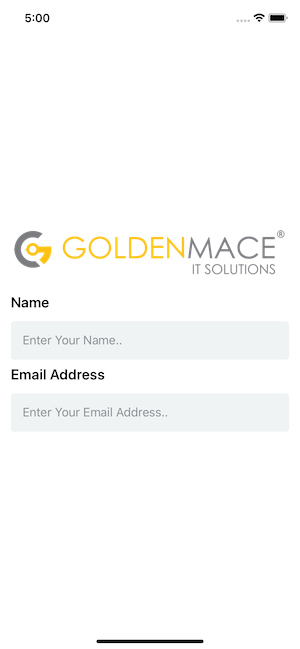
Create New Project:
Step1:-
Select the Single View App.
Step 2:-
Enter your Product Name.
Select the Language Swift / Objective – C.
Last Choose a SwiftUI check box for create swiftUI Project..
Then Click the Next button.
Select your paths where your project is stored, Then Click in Create Button.
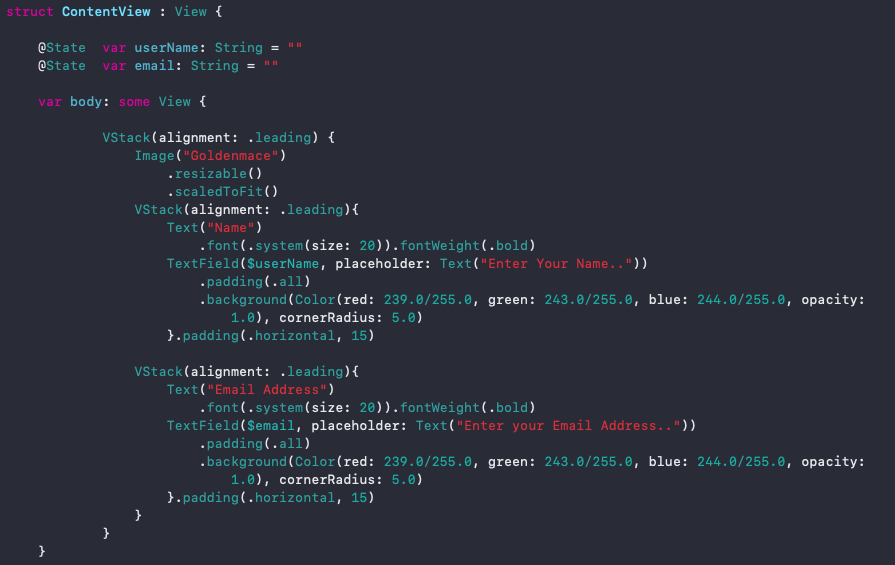
Explain Code:
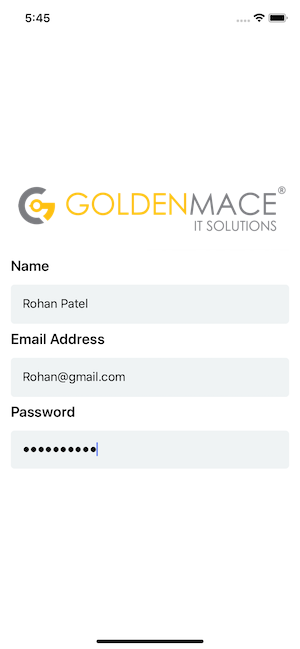
Declare variable to store textfield value.
e.g..VStack ie vertical stack which contains image label and textfield vertically, and assigning padding, font, frame, cornerRadius , background Colour etc…
Assigning PlaceHolder to the TextField.
Our output code has now been returned:-
Now we create secureField for Password TextField.
1st we should create one variable which stores password TextField value. @state private var password: String = “”
Output:
So here when we enter password at that time entry must be secured .
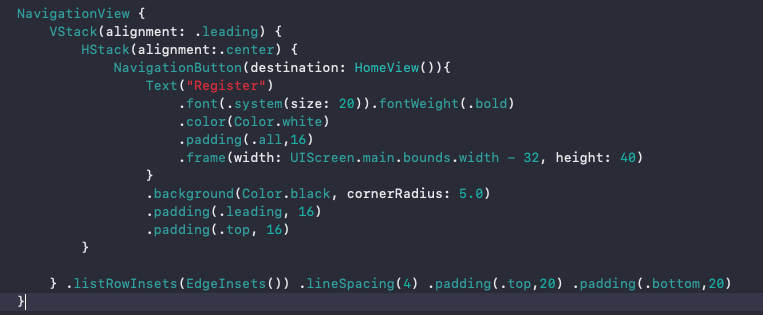
Now we are adding NavigationView for navigation.
Add all the precisely added VStack in the NavigationView and make label with required padding, background colour etc as click for navigation to next view.
And create NavigationButton and in parameter give destination for navigated to your Second View.
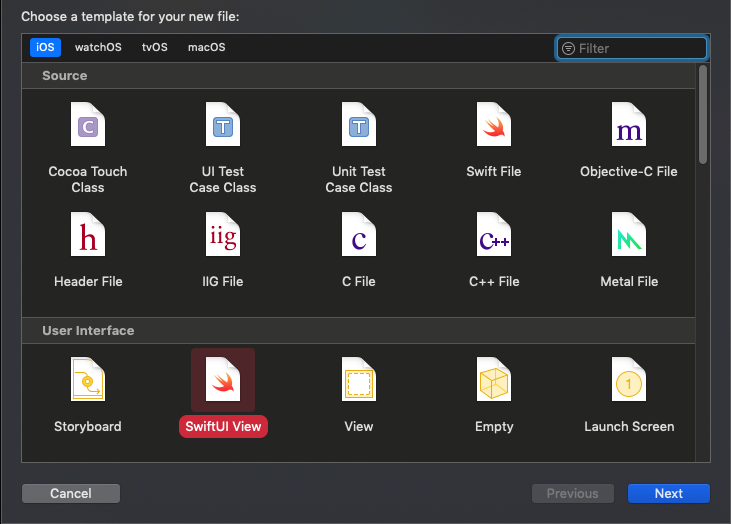
Now we are adding new Swift UI View File :
In Project navigator -> Select Project Folder Tapped Right Click and Select New File. -> Select Swift UI View.
Our New Swift UI view File name is “HomeView.swift”.
Create List Demo in HomeView
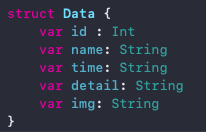
Create Structure for Data
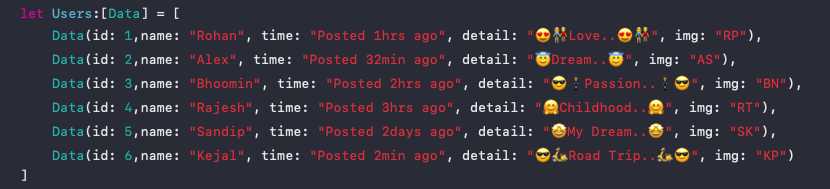
Create Array of Structure Data in HomeView Body
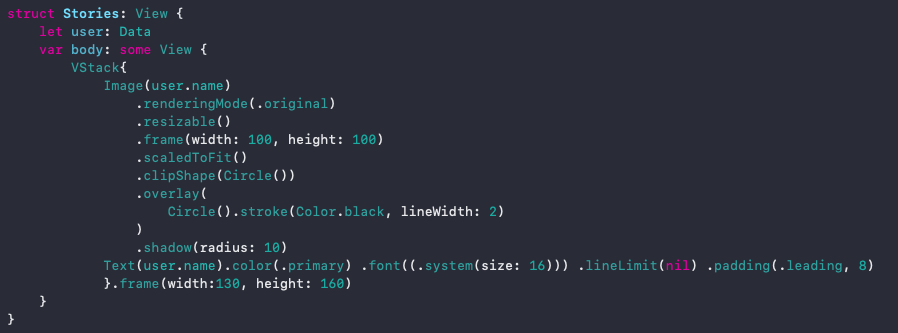
Create Stories Structure View
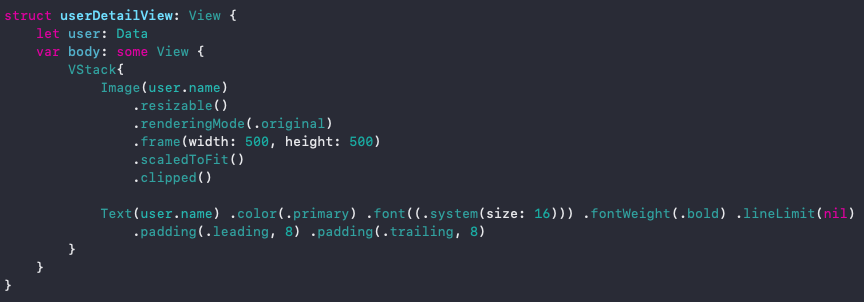
let user : Data is variable of Data Structure
VStack ie vertical stack which contains Image with required frame and give Shadow with CornerRadius, scaleToFit(), clipShape(Circle), overlay for giving stroke line to image
Also Add 1 Text which displays user name with required fontSize, lineLimit, and Padding up to leading.
And lastly we set frame for Vstack
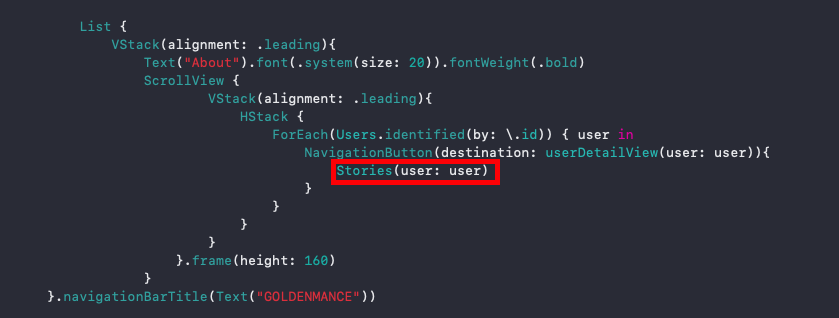
Now we will use Struct Stories in HomeView Body
Create List with VStack which contains text with required fontSize and fontWeight and lastly add Scrollview
The ScrollView will contains VStack with HStack which will scrolling vertically
HStack will contain ForEach which contains Stories Struct View and adding NavigationButton for redirect Next View our next View name is userDetailView
And lastly we add 1st VStack frame with 160 Height and navigationBarTitle
userDetailView struct View
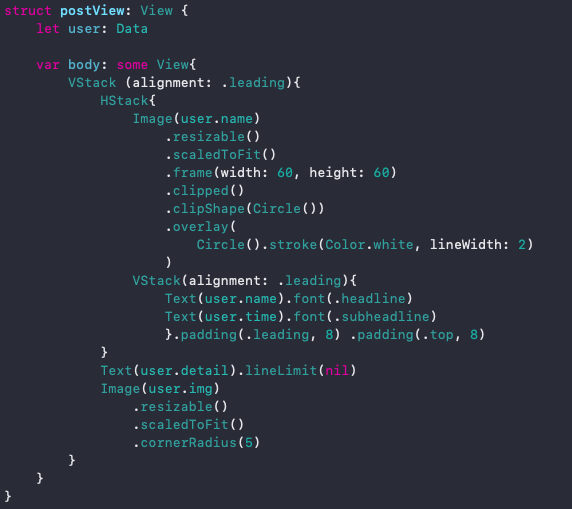
Now we create postView struct View
In postView struct create one variable of Data struct
Then add Vstack and in Vstack add HStack ie Horizontal stack which contains one Image with require frame and give Shadow with CornerRadius
Add Second VStack which contain two text. First text will display userName and second text will display timing. With padding to leading & top 8
And at last adding one text which display userDetail and add Image with required cornerRadius, scaleToFit().
And this postView struct view add in HomeView Struct view at the end