How to publish your library to jCenter

Setup your repository on Bintray. Sign Up for an Open Source Account and check your Android project. Learn more about challenges and how you can publish your library to jCenter.

How to publish your library to jCenter

In our everyday life as a developer, we always write code that can be reused in a lot of projects. And this is basic and expected. Well, who would want to create the same utilities or custom widgets repeatedly for each new project we take. Rather than copying, pasting and editing code struggles, it is much more convenient to write the code for once and re-use it wherever you want. In this post, i am sharing how you can upload an android library to bintray and how to overcome the challenges you might face. Boost your productivity double folds with this guide.

So let’s begin!

Step 1: Build your library
First you must create sample project.
https://developer.android.com/studio/projects/create-project
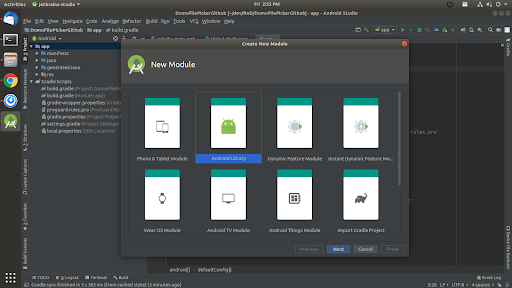
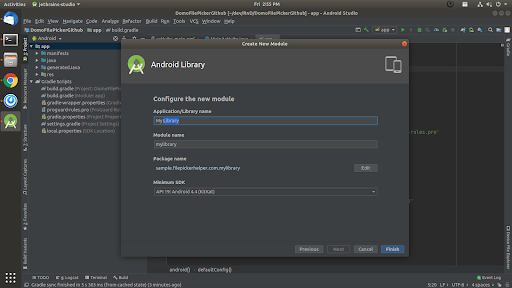
To make a library, it is possible to create a library module inside an existing project. Goto File -> New -> New Module
Select Android Library and click Next
Fill Details and click on Finish. That’s it: you have your own library!
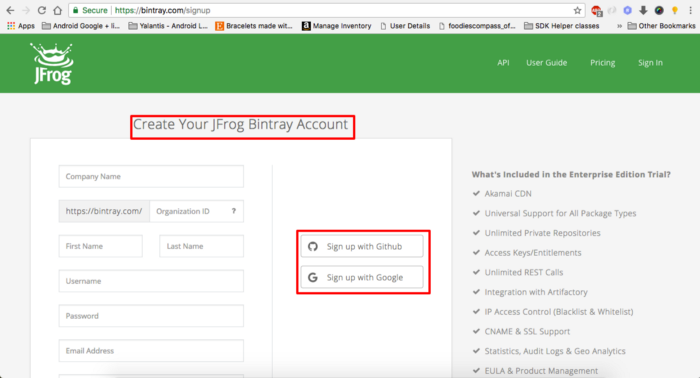
Step 2: Create your account in Bintra

Click here to open bintray website.

Note: For now, we are creating a free account, which means all the projects added to Bintray should be open sourced.

After you register an account, create new Repositories.
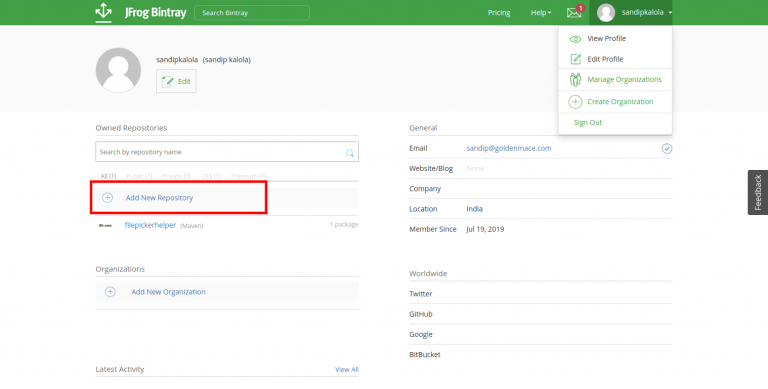
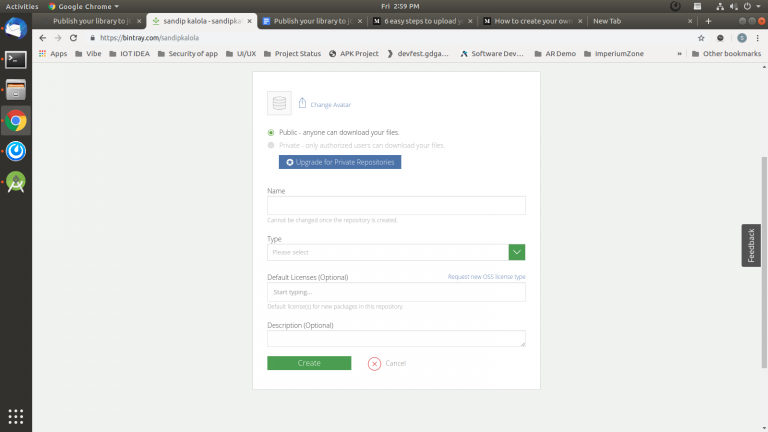
Click on the Add New Repository. You should be redirected to the below screen.
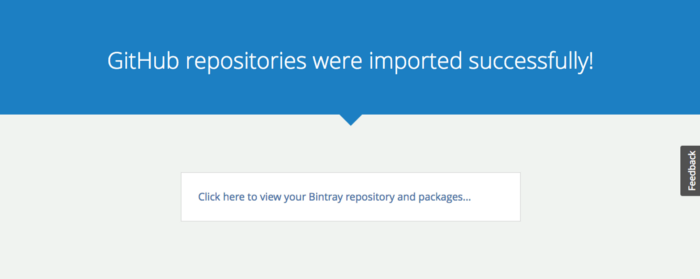
Enter details of the library project and click on Create. You will be redirected to the following screen if all goes well.
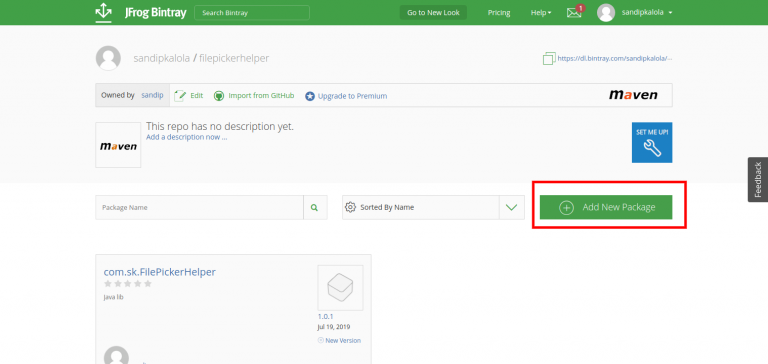
After you successfully create repository, now add new package
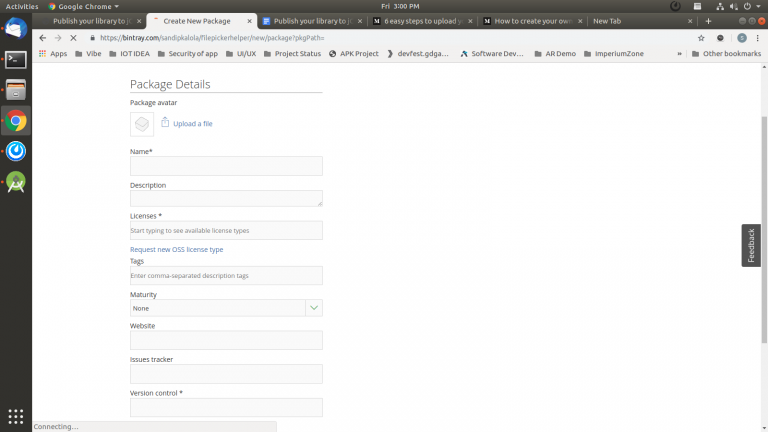
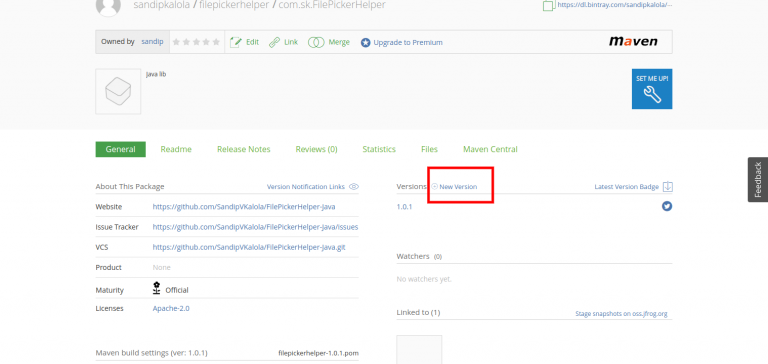
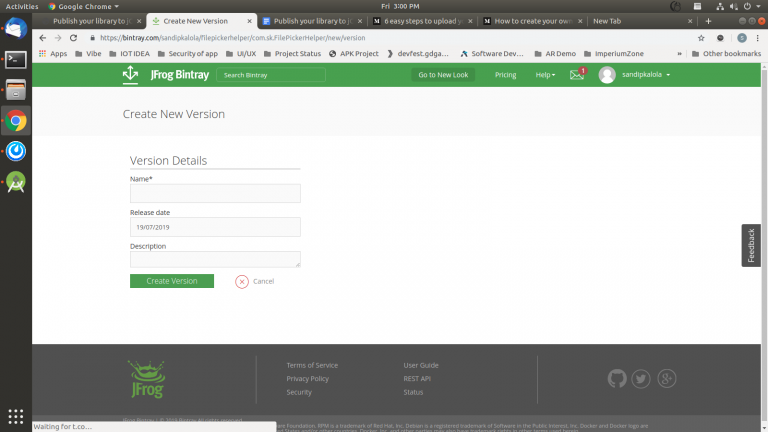
Fill the requested details for package. After package created, need to add version
Now your repository is ready for upload on your lib.
Step 3: Setup Bintray to our lib

Now, let’s add the bintray to our project. There is a great plugin that is available which makes it super easy to upload our library to bintray. Let’s add that to our project.

Add to the project build.gradle file the following dependencies:

dependencies {
    classpath 'com.android.tools.build:gradle:3.4.2'
    classpath 'com.jfrog.bintray.gradle:gradle-bintray-plugin:1.2'
    classpath 'com.github.dcendents:android-maven-gradle-plugin:1.5'
}
Add your bintray authentication details in the local.properties file, which by default is added to the .gitignore file by Android Studio (those information are sensitive and should not be pushed to your version control system).
bintray.user=YOUR_USERNAME
bintray.apikey=YOUR_API_KEY
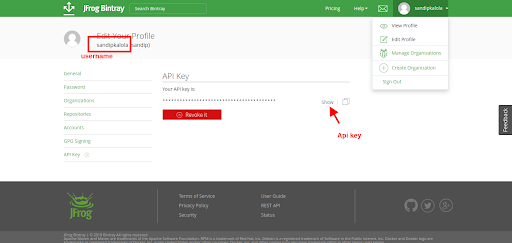
The username is the one that you created when you signed-up. The API key is listed in your profile configuration; click edit under your name and then the API Key tab.
Create a new file in lib module called install.gradle(make sure to change the lines commented with your own information)
Now create another new file in lib module called bintray.gradle (make sure to change the lines commented with your own information)
Finally “apply” those two new gradle scripts to your module build.gradle file, by writing those two lines at the bottom of that file:
apply from: 'install.gradle'
apply from: 'bintray.gradle'
Now Sync your project gradle.

Step 4: Upload to Bintray

Just execute those two commands in your terminal and your library will be uploaded to bintray.

./gradlew install
./gradlew bintrayUpload
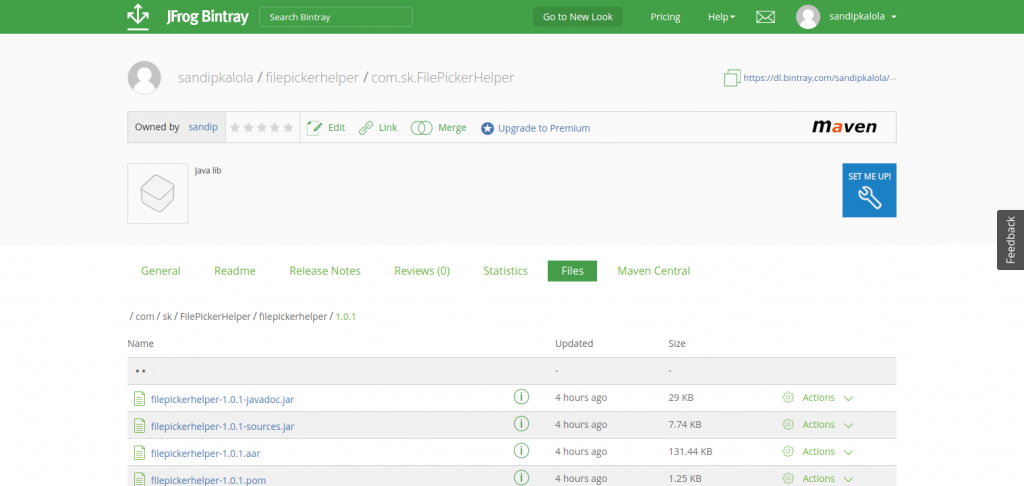
Let’s check the bintray package status. If everything worked as expected, then you will see your library version uploaded as shown in the picture below.
Step 5: Link to JCenter
Under your project repository in Bintray, you will see your library along with the version details you had specified. Now all you need to do is click on – Add to JCenter.
And that’s it! You just have to wait until you get a notification in bintray that your library has been accepted to join JCenter before anyone can begin to use your library.
Once your library is uploaded to bintray and has been accepted, you can use your library. For example, my dependency looks like this:
compile 'com.sk.FilePickerHelper:filepickerhelper:1.0.1'
And this is it! Hope this article was useful.
Thank you for reading. Let us know if you have any questions about this.